Wendt Pottery Clay Standards Page 2018
People have asked about using Helmer Kaolin as a glaze ingredient and a flashing slip. I never use any other kaolin because Helmer works fine any time kaolin is called for. I recommend using coarse clay like 10 mesh or 18 mesh because it is easier to disperse in water.
Below are general helpful hints and some test results you can check for yourself.
Slaking Method:
I plan ahead. Use warm or hot tap water far in excess of the final amount needed (except for casting slip, there use the exact amount). Sprinkle the desired amount gently into the water and DO NOT STIR! I stress this because stirring causes the clay to form a gummy coating on the particles that then slows slaking. Letting it sit a while allows real slaking to occur. Over night is even better. Once slaked, use a high speed mixer to make a thin slip that will pour easily through the desired screen. I just tested 100 g. of Helmer 18 mesh this way and found that 92.4% of the slaked clay passes a 400 mesh Tyler US Standard screen.
The material that remains on the screen is mostly mica with a small amount of silica and feldspar.
Set aside the screen and allow it and the debris on it to dry. Weigh the material left on the screen and make note to add additional clay to account for the material you screened out. Once you know the amount that won’t pass your screen, you can always use the corrected amount to get the desired result.
Simply let the material settle and remove the excess water before adding the other ingredients.
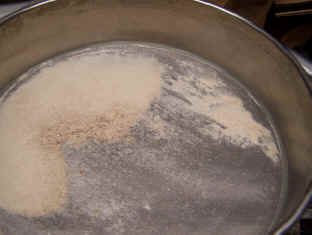
Notice there is some organic matter that made it through the screen. This is because the clay was screened only once, to 18 mesh and long, thin organics often sneak through vibrating screens if the end can get a start through the wire mesh.
It is for that reason that I began the practice of drum screening. Since the drum screen revolves rather than vibrating, materials that partially lodge in the screen openings are dislodged by the striker cam hammers that tap on the screen at the top of its travel.
I screen all the clay feed to the hammer mill through 10 mesh, then 20 mesh before it is introduced to the hammer mill.
The result is much more uniform clay grind with no oversize contaminants ever. Drum screens do not develop holes or cracks that allow oversize to pass because they never vibrate violently.
I also added an air balancing damper to the dust collector column on the roll mill. It keeps the particle size of the air float the same. Before, the suction was very high with clean bags and very low when they were nearing time to shake down. Now, the damper opens wide when suction is high and gradually closes tighter as the bags load up.
Screen trials have shown that 96.7% of the clay now passes a 400 mesh screen in a wash trial. The material that does not pass is again mostly mica with small amounts of feldspar and silica. This is the new airfloat that is now shipping.
Clay Stiffness Testing Method
This method was developed as a way to quantify actual clay stiffness without using a penetrometer which is inaccurate due to clay’s stickiness. It relies on identically sized and shaped slugs being subjected to a measurable height reduction of 30% (arbitrarily chosen distance) with thin plastic sheets on the pressure faces to rule out sticking as a complication.
See photos of the equipment and procedure at the bottom of the page.
Test from 12-01-03
I cored Seattle Pottery’s SP750 Columbia White cone 8-10 directly from the cut face of an undisturbed pug several months old. The core required 19.35 PSI to cause it to deform 0.3000 inches. I then wedged another piece from the middle of the same pug and cored it. After wedging, a weight of 15.75 lbs resulted in 0.3000 inches of deformation. Slugs 1″ in diameter by 1″ long weighed exactly 28 g and weighed 22.7 g after air drying until no further weight loss was noted.
I cored Seattle Pottery’s SP760 Pine Lake White cone 4-10 directly from the cut face of an undisturbed pug several months old. The core required 19.25 PSI to cause it to deform 0.2335 inches. I then wedged another piece from the middle of the same pug and cored it. After wedging, the same weight of 19.25 lbs resulted in 0.4560 inches of deformation. This is nearly twice as much after wedging using the exact same weight. This is what most people expect.
I cored my medium Helmer body which had been in storage for several months. The core taken directly from the pug required only 13.55 lbs to achieve a 0.3000 inch deformation. Surprisingly, after it was wedged it deformed only 0.1810 inches under a 13.55 lb load. This is NOT what one expects. It is what the clay feels like to me, though. I notice the Helmer body gets stiffer as I wedge it rather than softer! Explanations?
I next returned to the original format proposed: to take all samples to the same 30% deformation and thus compare the stiffness of each as a function of weight needed to deform them 30%.
I cored Seattle Pottery’s SP850 Kenzan Porcelain #1 White cone 8-10 directly from the cut face of an undisturbed pug several months old. The core required 14.85 PSI to cause it to deform 0.3000 inches. I then wedged another piece from the middle of the same pug and cored it. After wedging, a weight of 10.4 lbs resulted in 0.3000 inches of deformation. Slugs 1″ in diameter by 1″ long weighed exactly 28 g and weighed 23 g after air drying until no further weight loss was noted.
Conclusions: Clays lose moisture in storage, even in a heavy, high quality plastic bag. This is obvious to users. Also obvious is that as clay sits undisturbed, it takes up “set” so that the undisturbed pug feels very firm.
Wedging really does reduce the force needed to change the shape of the clay. The amount of force needed to alter the clay depends on moisture content AND the amount of non-plastic material in the clay body.
As the amount of non-plastic material in a body increases, the softening effect of wedging becomes measurably less.
Below is the test plunger being machined so it measures exactly 1 square inch and is true and flat with respect to the shaft. The wooden frame is easy to build, has a very low coefficient of friction with metal and costs next to nothing. The most expensive part is the digital vernier caliper. Mine is accurate to 0.0005″.The view with the caliper shows a round slug used to calibrate the device. It is exactly 1″ in diameter. The caliper is brought into contact with the top plate and the reset button is pressed to get a true zero each time.
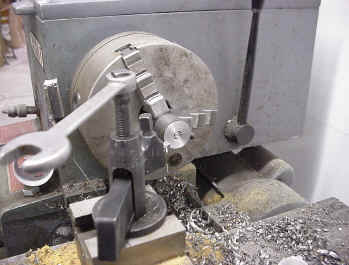
Lathe work assures the plunger will have an exact area of 1 square inch. Even though the cores are less than 1 square inch initially, by the time they deform 30%, they contact the entire face of the plunger and so give a true force based measurement anyone anywhere can test and repeat easily.
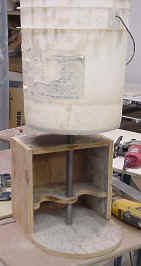
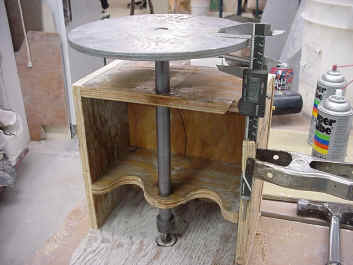
Full view of the machine with weight on top. Since the first test gave me the general range of values that clay deforms under, I have replaced the large bucket with a steel weight of 5 lbs and will have additional weights made at the machine shop to allow quicker testing. Only the final 5% of deformation requires the smooth application of force to get a true reading without overshoot. I found that overshoot happens because clay “creeps” under a load.
This creep feature means that the reading continues to change with time if the load is higher than the true force value for the body being tested. That is probably why the standard penetrometer is useless in this application.
 Calibrating the platen to 1″.
Once the unit is built, the cores are taken from a pug of clay using the Monoject 60 cc syringe with the end cut out. The slugs are next cut exactly to 1 inch height to assure all the samples tested are identical. For ease of use, the slugs are capped top and bottom with thin plastic bag stock. Notice the slug in the picture spread out to slightly more than the diameter of the plunger, giving a true value of the total weight it is able to support with one square inch of top area.
The reason I think this test method is more meaningful to potters is we already do this test with our hands. When we mix clay, we take a piece and squeeze it to see if it feels right. When I want batches to match, I swap samples from hand to hand. Now consider the tester… each batch that I mix can be tested after 15 minutes of mixing by pulling a core, putting it under the plunger and recording the tester value. If the clay requires more force than the target value, I can add a few pounds of water, mix again and then test. Likewise, if the clay is softer than the recorded value, I can add more of the dry blended body to stiffen it up until it matches. With practice, I am sure the reliability of the process would go up.
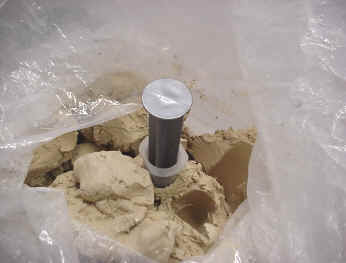 Core sampling.
 Cutting the samples to 1″.
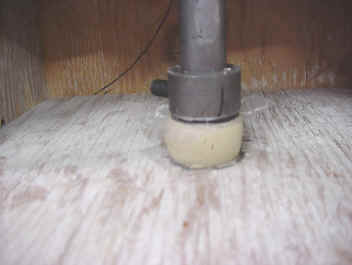 30% deformation, note the plastic sheets.